

WARNING: PLEASE DO NOT RUN THIS REMOTE CONTROL WITH A VOLTAGE GREATER THAN 14VDC. DO SO WILL PERMANENTLY DAMAGE THE RECEIVER BOARD.
We have discovered that many of the 27A batteries inside the key fobs have been drained to a low-voltage state, causing intermittent control issues. Please replace them with the fresh batteries provided. Thank you.
Introducing our cutting-edge Wireless Controller, designed to operate as a reversible momentary control switch powered by an 11-14V DC source. Easily manage motor direction with intuitive controls—press and hold the right button to run the motor one way, and do the same with the left button to reverse the action. Let go of the button to halt operation. With a robust 15-amp current rating, this controller ensures consistent and reliable performance. The package comes complete with two transmitters, batteries included, and boasts an impressive wireless signal range of up to 100 feet. Elevate your control experience with this versatile and efficient solution! MOM-RC2 accepts additional keyfob(s) by pairing. Its receiver's code can be reset. This unit is designed to run a 12v brushed dc. motor.
Features:
- Power Source: 11-14V DC
- Function: Reversible momentary control switch
- Motor Control:
- Right button for one direction
- Left button for opposite direction
- Current Rating: 15 amps
- Transmitters: Two included
- Batteries: Included for transmitters
- Wireless Range: Up to 100 feet
- Pairing: Additional keyfob(s) may pair with the RC receiver
- Reset: RC receiver's code can be reset in case of radio signal conflicts
Add more keyfob(s):
- Power on the receiver unit. The receiver is the box with wires connected to the 12v power source and the motor.
- Within 15 seconds of powering the receiver, press and hold one of the keyfob's two buttons (A or B) for 5 seconds.
- Confirm successful pairing by observing the receiver's LED light (inside) flashing 3 times.
Battery type used for this keyfob is 27A alkaline battery.
You may buy additional keyfobs from the link below:
RC Transmitter Keyfob for MOM-RC2

Reset the receiver:
- Open the receiver to expose the circuit board.
- Locate the push button on the circuit board, which serves as the reset button.
- Power on the receiver unit.
- Press and hold the reset button for 10 seconds.
- Confirm successful reset by observing the receiver's LED light turned off.
The Receiver's Reset Button

Instructions for Replacing the Battery in the Remote Control:
Locate the Screw: Turn the remote control over to the back side. You will see a small screw located near the top, usually close to the keyring attachment.
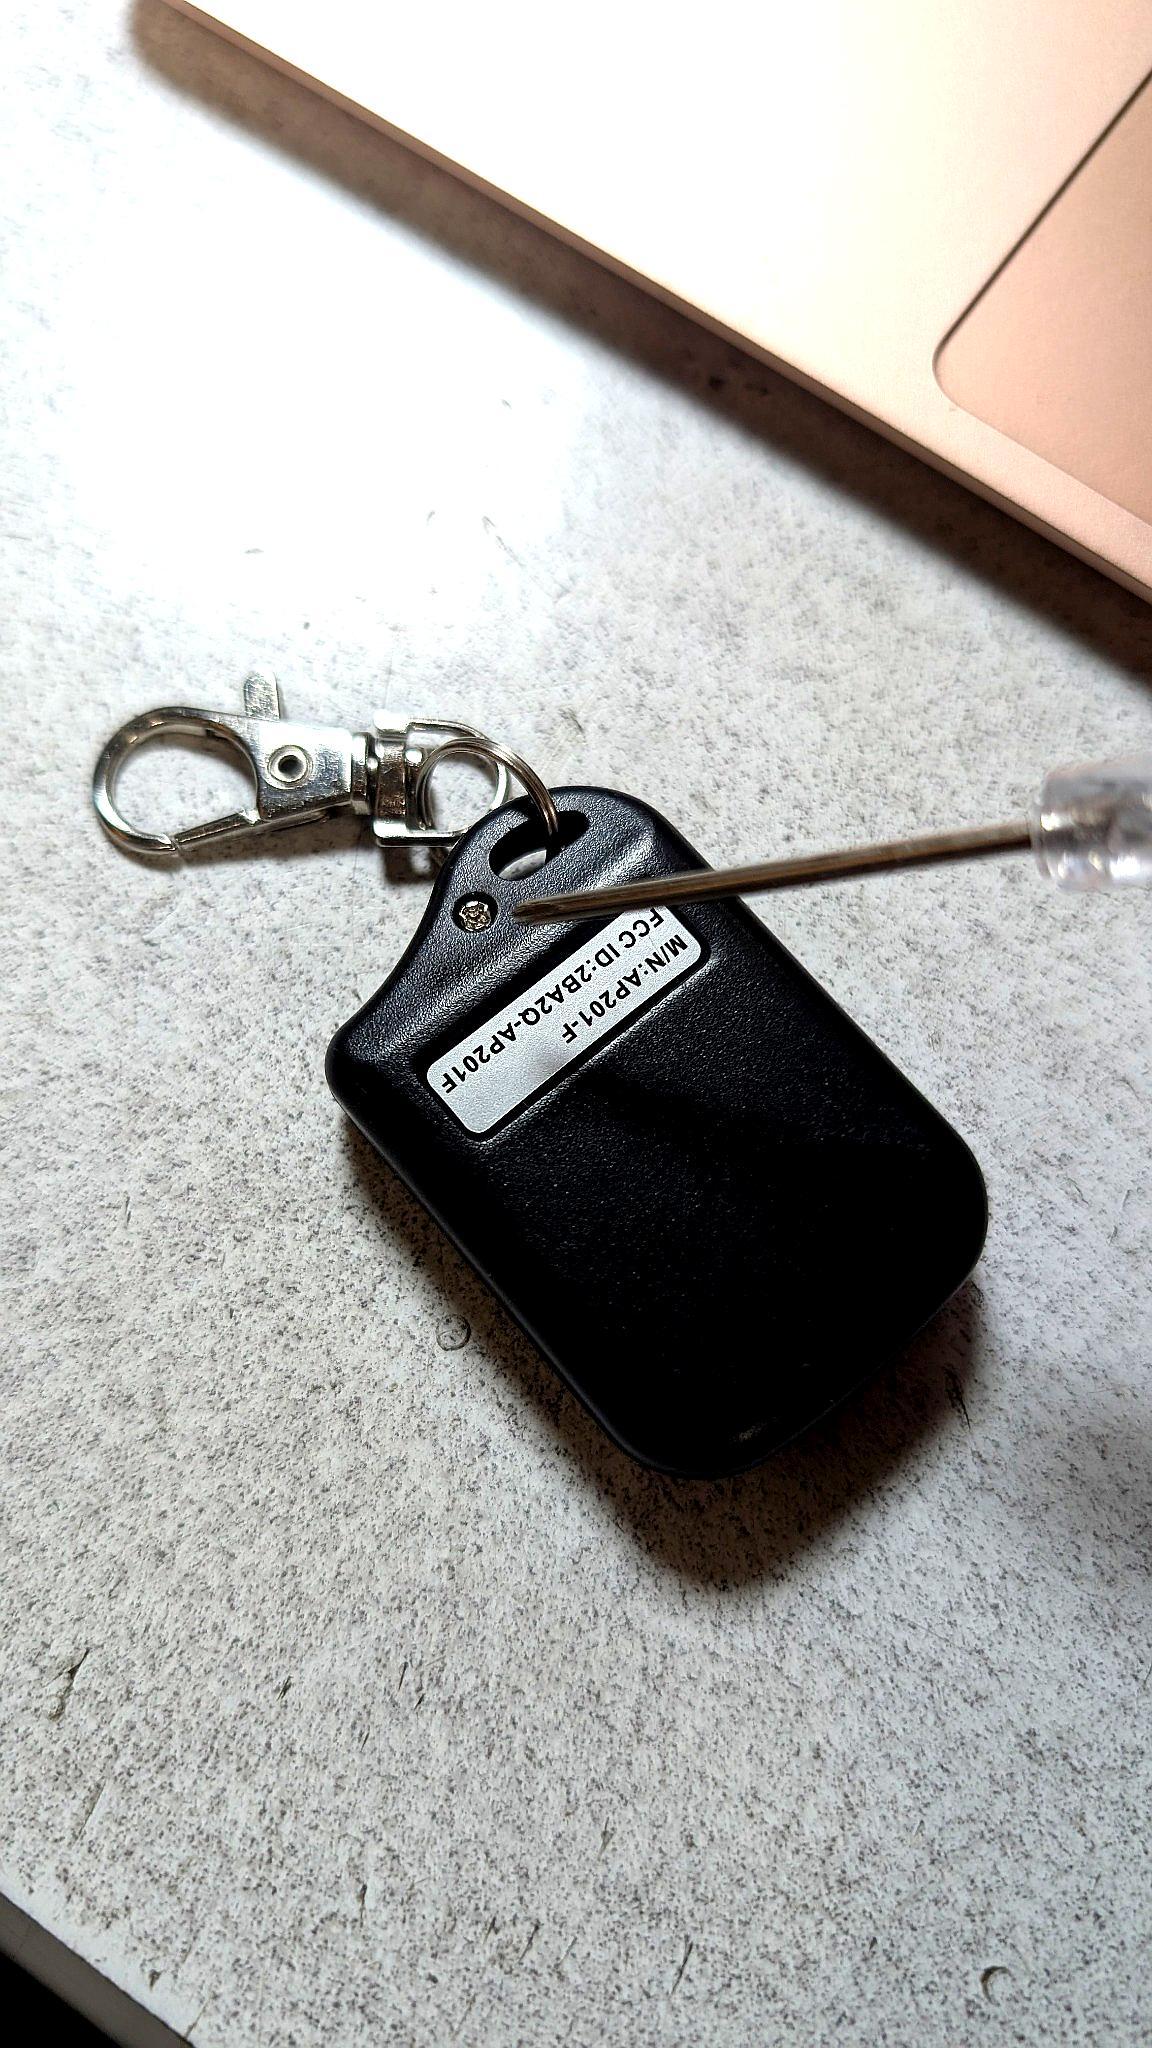
Remove the Screw: Using a small Phillips head screwdriver (like the one shown in the picture), carefully unscrew and remove the screw. Set the screw aside in a safe place so you don't lose it.
![[Image 2: Screw removed and placed aside]](https://cdn11.bigcommerce.com/s-q63z26x00i/images/stencil/original/image-manager/edited-rcbat2.jpg?t=1742013974)
Open the Remote Casing: Gently separate the two halves of the remote control casing. A razor blade (or a thin utility knife blade) works well for this. Be extremely careful when using a razor blade to avoid injury. Carefully insert the very tip of the blade into the seam between the two halves of the casing. Gently pry them apart, working your way around the seam. You may hear a click as the casing begins to separate. Avoid inserting the blade too deeply to prevent damaging internal components.
![[Image 3: Remote casing opened]](https://cdn11.bigcommerce.com/s-q63z26x00i/images/stencil/original/image-manager/edited-full-rcbat3.jpg?t=1742014000)
Confirm Battery Type: The battery should be a 27A 12V alkaline battery. Once the casing is open, you will clearly see the battery. It's essential to replace it with the exact same type to ensure proper operation of your remote.
![[Image 4: Battery visible inside the opened remote]](https://cdn11.bigcommerce.com/s-q63z26x00i/images/stencil/original/image-manager/edited-rcbat4.jpg?t=1742014140)
Remove the Old Battery: Gently pull the old battery straight out from its holder.
Tip: Pay attention to the orientation of the battery before removing it. Note which side is facing up or down (positive and negative terminals), so you can insert the new battery in the same way. Usually, the positive (+) side is marked on the battery and the holder.
Install the New Battery: Take your new 27A 12V battery and insert it into the battery holder in the same orientation as the old one. Make sure it is firmly seated and makes good contact in the holder.
Close the Remote Casing: Carefully align the two halves of the remote control casing and press them back together until they snap or click into place. Ensure the seam is closed completely all the way around.
Reinstall the Screw: Place the screw back into its hole and tighten it gently with the screwdriver. Turn the screw until it is snug, but do not over tighten, as this could damage the plastic casing.
Test the Remote: Try using your remote control to see if it is now working correctly with the new battery. Press the buttons and check if the intended device responds.
6 Reviews Hide Reviews Show Reviews
-
Motor control
Worked perfectly for a replacement control unit. The first unit had a glitch but Customer Service quickly resolved the problem sending another unit which worked flawlessly.
-
Wireless momentary remote
Batteries in both remote switches were almost dead when I received it. So it did not work . I emailed manufacturer and they were very prompt with a resolution but I did have to buy new batteries.
-
RC wireless remote
Great product! Easy to install. Great company. Responsive to emails, very helpful. I highly recommend this company.
-
Perfect, worked great right out of the box.
Control worked great right out of the box. I wanted to be able trigger my 12 volt hydraulic pump from two locations, the remote MOM-RC2 switch and a wired momentary switch wired in parallel to the pump. Had an issue with feedback so I contacted customer service and was able to speak to a gentleman who was on vacation with his family between Christmas and New Year. We decided that adding a couple of "diodes" on the output leads would correct the issue and it did. Thank you for your assistance and helping me during your time off. Above and beyond most service these days. Thank you. John
-
Easy install,
The range of the remote switch isn't as good as I hoped and also when I'm running led lights on my car, the frequency must be severely interrupted. Unfortunately, I don't think this kit is better than what i had before.
-
Remote Control
Worked perfectly
 are included in this
package. Wireless signal range is 100 ft.")


")